KEEP YOUR ODOR TO YOURSELF!
Some plants are wonderfully pungent, but some people will try to judge you simply on what they smell. There is no point in bringing unwelcome attention.
Here is a simple and effective carbon filter that anyone can make. This was sent to us by a good samaritan who found it on the net credited to Kobal. This is a jewel, Thanks Kobal. This unit will remove odors as well as a commercial filter costing hundreds of dollars.
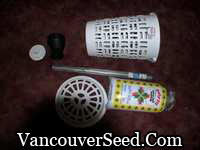
You'll need the following supplies:
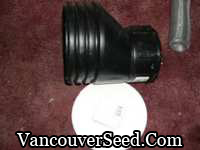
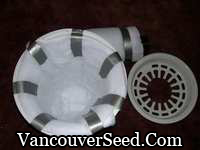
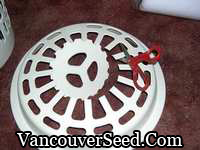
one 6" pvc clean out cap.
one 4" to 6" pvc adapter.
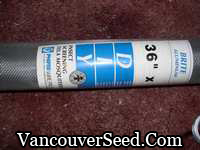
one roll of aluminum screen (you need the strength of the metal to retain it's shape).
one roll of tuck tape, which is perrfered, or duct tape.
one clothing hamper or other suitable containers.
one roll of high loft quilt batting.
one length of 4" dryer vent hose.
Where can I get virgin activated carbon?
You can get carbon at most aquarium supply web sites - buy the bulk containers. I recommend the Kent marine or Esv brand; pelletized activated carbon in the 5 gallon bucket - 5 gallons should do at least a couple fills, which should last for years. You can use lignite-based carbon, but be sure to find "ACTIVATED" AND "PELLITIZED" - it is much more effective than the crushed carbon.
Pelletized activated carbon has been crushed and formed into pellets, then washed in an acid solution to create millions of charged pores in the pellets. As air passes through the pellets, it attracts odor ions and particles. The carbon becomes “exhausted” when all the pores are clogged. Pelletised carbon has more available surface area than the crushed stuff, and becomes exhausted much more slowly. It can be found and most online aquarium supply outlets
Construction of the Carbon Filter:
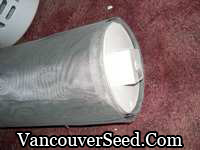
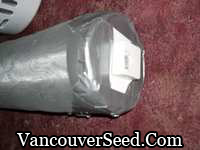
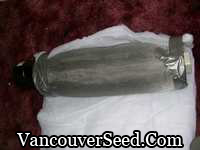
Wrap open our roll of screen around the pvc cap, then tape the cap in place. This holds the screen open to the appropriate size for our use.
We need to trim the screen roll down to the appropriate length for the size hamper we are using. Just eyeball it to be even with the top of the hamper rim; you want to be within an inch or two.
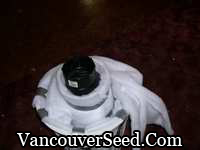
The next step is to insert the 4" to 6" adapter and tape it in place.
Now we need to wrap the tube we just built in some of the quilt batting. Unroll the roll of batting and double it over until it is the same length as the tube we have built.
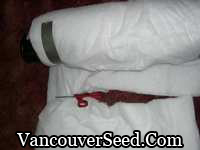
Here I show the appropriate batting length for the hamper we are using - this means unfolding the batting one time after unrolling it; it is then conveniently cut to the right length.
Now tape the end to the screen, roll the tube around till the batting overlaps just a bit and trim her off. Tape the batting up nice and clean.
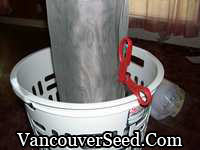
Ok, now we need to line the inside of the hamper with the batting - the same fold size will work here also. Just wrap the inside and then tape it to the top rim so that it wont move around or drop down into the hamper during filling.
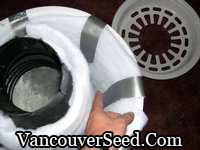
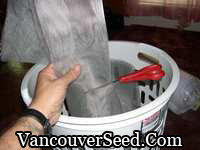
OK, now we can insert the tube we have just finished building inside the batting-lined hamper basket. Hold the inner tube as you pour in the carbon between the two layers of batting. You can change the amount of carbon by simply wrapping the tube with more rounds of batting. This filter would probably use 7 pounds or so.
A 26mm thick layer of carbon is considered an optimum thickness for odar removal.
All we need to do is add a roll of batting to the top to close things off nicely.
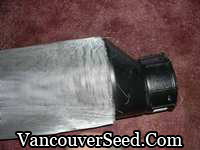
Now we can cut out the top so that we can get the lid over the tube end. Stick the lid on and maybe tape it down if you need to.
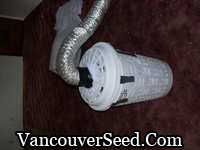
Now we can attach out 4" dryer vent hose and tape it in place. Attach the other end to a suitable air blower -> a clean fresh smelling room!
A 265 cfm Dayton blower removes the smell from a 42 bucket 5000watt room effectively. You could use a larger fan if you needed, this system could handle a 450 cfm or even larger will no problem.
|